Complete guide with the history, secrets and all collectibles for Zelda: Link’s Awakening of Game Boy Color and its Nintendo Switch remake.
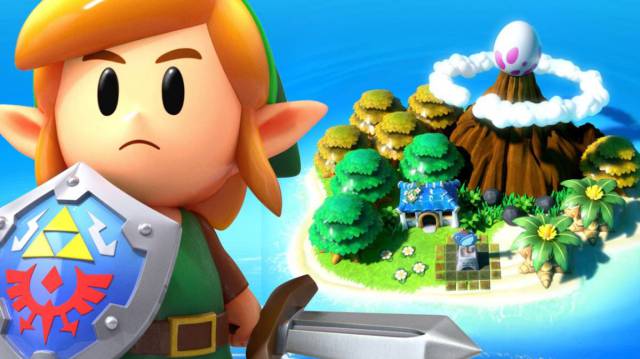
The Legend of Zelda: Link’s Awakening was originally published for Game Boy in 1993 by Nintendo and later came to Color. It is a very special work within the saga that has a 9.8 note on our page. Recently we met that it will be remastered for Switch, so it will be on the lips of all fans of the series. Therefore, we have decided to make a trip to the past and return to play Link’s Awakening in its version of Game Boy Color to bring you this complete guide, very necessary to not lose detail or leave behind any secret in the adventure. Remember that it is fully compatible with Switch's Legend of Zelda: Link’s Awakening Remake.
Walkthrough through History
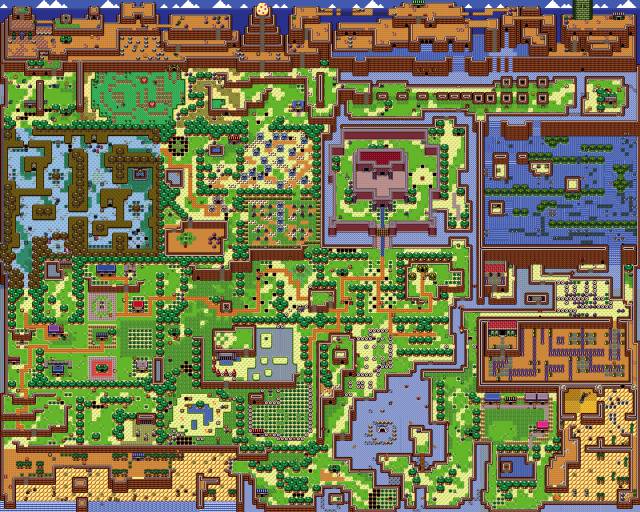
Here we leave you an index of what history gives of itself, dividing the chapters in the necessary way until a dungeon will arrive and the progression of the dungeon itself. In addition, at each moment we detail the location of the heart containers and other secrets that we find through the wide map. We are also describing the process of exchanging objects until we finally get the Magnifying Glass, essential to overcome the final stretch that gives us access to the Egg. That said, we leave the index and below we continue with the collectibles and a secret dungeon.
Tail Cave: Mysterious Forest and Progress through the Dungeon
We start the adventure waking up on the strange island of Koholont. We take our first steps, meeting important characters and getting the Magic Powders and the Bird Feather, which will allow us to jump and will be very useful.
Cantaro Grotto: Goponga Swamp and Progress through the Dungeon
We continue to the second dungeon, having to go to recover the Chomp-chains that have been kidnapped and getting the Power Bracelet in Gruta del Cántaro, to be able to lift vases and rocks and thus clear the road.
Caverna de la Llave: Kanalet Castle and Progress through the Dungeon
We continue with a secondary task based on getting objects and exchanging them with various characters (to get the Magnifying Glass at the end of the game). In the third temple we will get the Pegasus Boots to run quickly and lash out at enemies and others.
Abyssal Tunnel: Yarna Desert and Progress through the Dungeon
We continue to the fourth dungeon, witnessing some beautiful scenes with important characters and finally getting the fins that allow us to swim and dive underwater.
Maw of the Catfish: Martha Bay and Progress through the Dungeon
We resume the mission of completing temples to get the instruments that await us inside, thereby reaching the depths of the fifth dungeon and getting there the Lanzagarfios.
Temple of the Face: Road to there and Progress through the Dungeon
In the Temple of the Face we make our way until we finally get the Magnifying Glass (having followed the steps that we indicate) and, in the dungeon itself, we will get the update of the Power Bracelet 2.
Torre del Águila: Mountain and Progress through the Dungeon
Being near the end we will get the Mirror Shield here and we will have to make sure we are well prepared to face the eighth temple, which is approaching.
Turtle Rock: West of the Tal Tal mountain range and Progress through the Dungeon
In the last temple we will be able to obtain the Fire Rod and prepare ourselves to finally go to the Egg and discover the secrets it hides.
End: The Egg
Once we have the eight instruments with us, in addition to the various melodies of the Ocarina and the rest of the objects that we have been detailing, we will go to the mountains to unravel the mystery of the island and the Flying Fish.
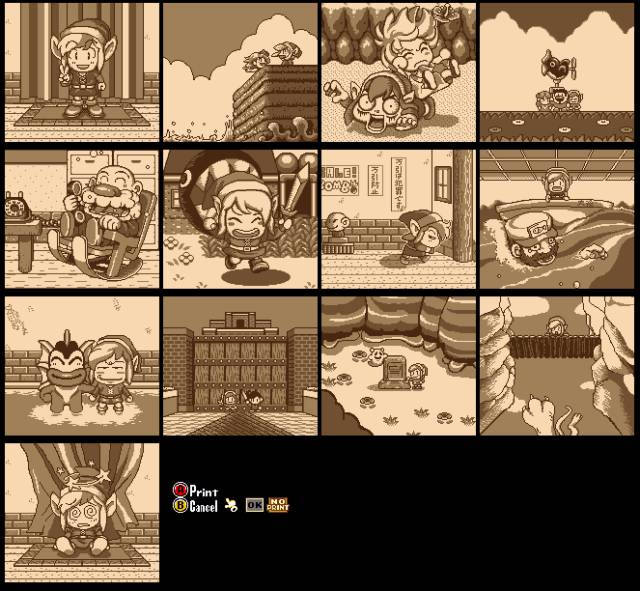
Collectibles (Photo Album) and Secret Dungeon
In this section of our complete guide we will explore some of the secrets that Link’s Awakening keeps. Among them we find the way to access the Color Dungeon and how to complete it. In it we will get a special suit of our choice (red or blue) that will raise our defense or our attack. To be optional we add it in this section instead of in the course of the main story. On the other hand, we have the photos that the photographer will take (up to a total of 12) and whose location we will have to find to complete the collection of the photo album called “Link trips”.
Color Dungeon
Photo album