
We tell you how to create a private and dedicated server to play with your friends in Valheim, the sensation of the moment. That’s how simple the steps are.
Valheim is the sensation of the moment. Survival is increasing at a spectacular rate, both in sales and in number of concurrent users. After having reviewed several of the essential elements to begin your survival, below we will tell you how to create a private and dedicated server to play with your friends.
-
Valheim: how to start playing, where to download, price and more
-
Valheim: minimum and recommended requirements to play on PC
-
Valheim: the best seeds to start and find resources more easily
-
Valheim: all console commands, cheats and codes for multiplayer and single player
Valheim: how to create a dedicated server
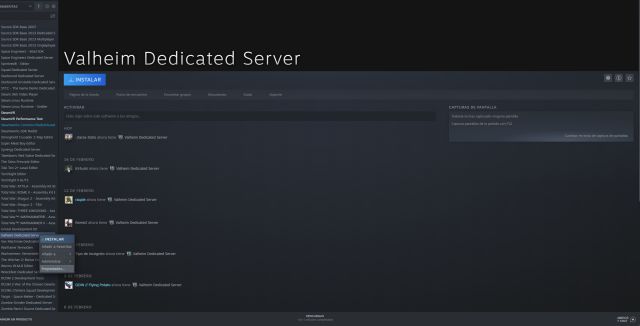
To do this, you must install the Valheim Dedicated Server tool, found in the “Tools” tab of your Steam library. After installing a file smaller than 1GB, you can start preparing it. Follow the next steps:
-
1: configure your router
To begin, you must configure your router to receive the game ports. Enter using the address of yours in administrator mode. Once inside, look for “port address”, which is usually in advanced settings, and set ports 2456-2458 in such a way that they pass in local mode and your firewall.
-
2: find the start_headless_server.bat file
To find the file we say at the top, right-click the Valheim Dedicated Server tool in your Steam library. Click on local files. You will see several. Go to start_headless_server.bat and right-click on it. Edit it. We recommend creating a copy before starting to edit the original.
-
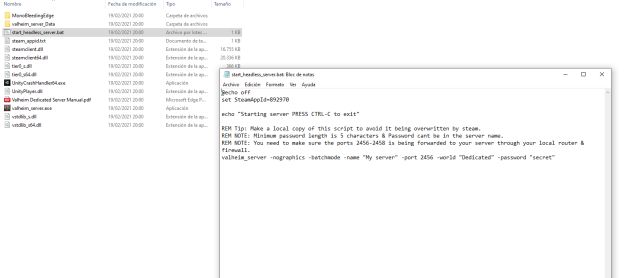
3: edit the start_headless_server.bat file
When you open it in a notepad, we will have to look at the last line, which begins with valheim server. It will be followed by several words that are followed by other words in quotation marks. Those are the ones you should edit according to your preferences:
-name “My server” → the name you want to give to your server.
-port 2456 → this port must match the one you get on your router.
-world “Dedicated” → the name of the world to be generated. It should not be the same as the one on your server.
-password “secret” → the password of your server. If you leave it blank, it should appear as public in the list of community servers.
-
4: Start Valheim Dedicated Server
When you’re done editing the file, go to Steam and launch the tool. Wait for the screen to show that the server has been connected.
It would already be! Now provide the server name and password to your friends. Fire up Valheim and they’ll start to team up.
References: Valheim | VG247