January 14, 2020
Updated on January 14, 2020
Chris Watson is a gaming expert and writer. He has loved video games since childhood and has been writing about them for over 15 years. Chris has worked for major gaming magazines where he reviewed new games and wrote strategy guides. He started his own gaming website to share insider tips and in-depth commentary about his favorite games. When he's not gaming or writing, Chris enjoys travel and hiking. His passion is helping other gamers master new games.
Expertises: Game Development, Unity and Unreal Engine, C# and C++ Programming, Interactive Storytelling, Esports and Streaming
Tutorial to change the hard disk of PS4, PS4 Slim and PS4 Pro for one of greater capacity; All you need to know.
PS4 has three different models on the market, from the original or standard model to the current two, PS4 Slim and PS4 Pro, the most powerful version of the Sony desktop console family. All of them are available with different capacities of hard disk, from 500 GB to 1 TB, although with the facilities and the constant updates of the current videogames, we can quickly run out of storage space with the serial hard drives. Luckily, Sony offers the option to change the hard drive of any PS4 model with a larger one, as long as we meet certain requirements. Next we tell you how to change the hard disk or internal HDD of PS4 for another one of greater capacity.
How to change PS4 hard drive
The first thing to know is that Sony does allow the user of its console to change the internal hard drive without losing the PS4 warranty; Of course, the company is not responsible for any damage caused during the process. Therefore, we offer you a complete tutorial so you can change the hard disk without any problem and according to the model of your console.
Tools to change the PS4 hard drive
In order to change the PS4 hard drive we need the following:
- A long Phillips screwdriver
- A computer with internet access
- A USB storage drive of at least 1 GB
- A compatible hard drive
- The PS4 firmware installation file available on the official PlayStation page
Hard drives supported
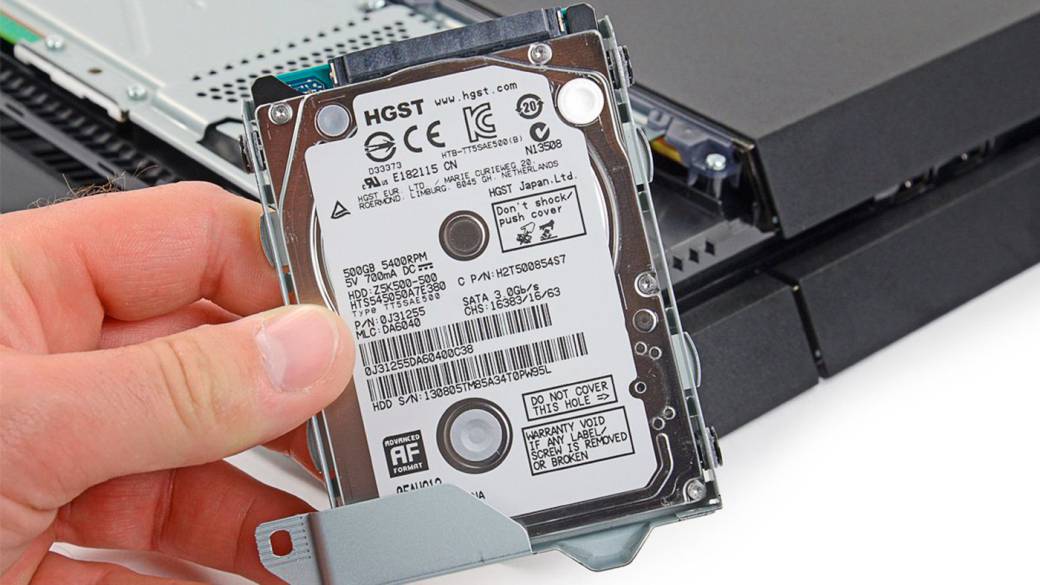
The PS4 hard drive is a SATA II 2.5 ”and 500 GB or 1 TB capacity at 5400 rpm and a thickness of 9.5 mm, or what is the same, a laptop hard drive . Therefore, the hard disk that we want to put in PS4 instead of the original should not exceed 9.5 mm thick and have at least 160 GB capacity; although if we want to increase the storage we will go directly to models of 1, 2 or more TB, depending on the model. Likewise, PS4 offers support for both conventional HDDs and SSDs, faster but also more expensive. Finally, 7200 rpm or hybrid hard drives are not recommended by Sony.
CUH-1000 / CUH-1110 Series / CUH-1200 Series (PS4 standard)
Make a backup copy of the saved data.
You can copy the data saved on the PlayStation 4 system to a USB storage device. You can also copy them to the cloud if you are a PlayStation Plus subscriber.
Connect a USB storage device to the system.
Select (Settings) on the function screen.
Select (Managing saved application data)> (Data saved in system storage)> (Copy to USB storage device).
Select a title.
Press the button to check the box of the saved data you want to copy and select (Copy).
In order to make a backup copy of the saved data, you must have updated the system software and logged in to PSN.
Make sure the PlayStation 4 system is completely turned off. When the power indicator is off, it means that the system is completely off. If the power indicator is lit in orange it means that the system is in standby mode. Exit standby mode.
Unplug the AC power cord and then disconnect the rest of the system cables.
For safety reasons, we recommend that you unplug the AC power cord from the power outlet first before continuing with the rest of the cables.
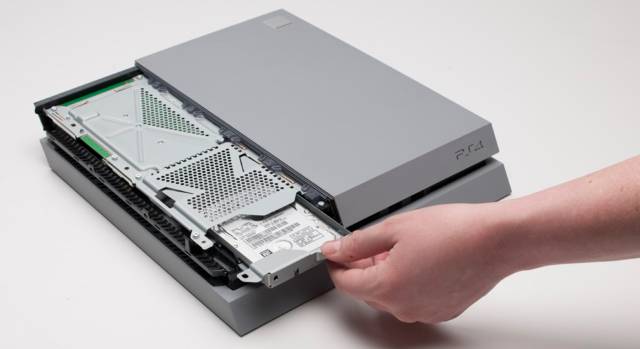
Slide the hard drive bay cover in the direction of the arrow to remove it.
Remove the hard drive.
Remove the screw.
Pull the hard drive toward the front of the system to remove it.
Use a Phillips screwdriver to remove the screws (four holes).
Do not remove the rubber parts from the screw holes.
Place the replacement hard drive in the mounting bracket of the system hard drive. PlayStation 4 and join them using the screws (four holes).
Do not overtighten the screws.
Secure the hard drive to the system with the screw.
Be sure to fully insert the hard drive into the hard drive bay.
CUH-2015 Series (PS4 Slim)
Make a backup copy of the saved data.
You can copy the data saved on the PlayStation 4 system to a USB storage device. You can also copy them to the cloud if you are a PlayStation Plus subscriber.
Connect a USB storage device to the system.
Select (Settings) on the function screen.
Select (Managing saved application data)> (Data saved in system storage)> (Copy to USB storage device).
Select a title.
Press the button to check the box of the saved data you want to copy and select (Copy).
In order to make a backup copy of the saved data, you must have updated the system software and logged in to PSN.
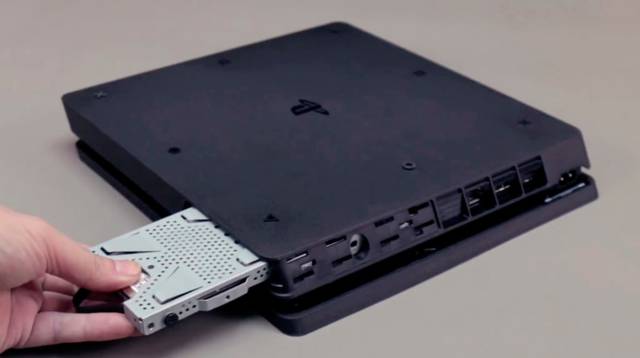
Slide the hard drive bay cover in the direction of the arrow to remove it.
Remove the hard drive.
Remove the screw.
Pull the hard drive with the mounting bracket to remove it.
Use a Phillips screwdriver to remove the screws (four holes). Do not remove the rubber parts from the screw holes.
Place the hard drive in the mounting bracket.
Insert the replacement hard drive into the mounting bracket, and then secure it with the screws. Do not overtighten the screws.
Secure the hard drive to the system with the screw. Be sure to fully insert the hard drive into the hard drive bay.
If you lose the hard drive bay cover, any screws, the mounting bracket or any other part, contact technical support for help.
CUH-7000 Series (PS4 Pro)
Make a backup copy of the saved data.
You can copy the data saved on the PlayStation 4 system to a USB storage device. You can also copy them to the cloud if you are a PlayStation Plus subscriber.
Connect a USB storage device to the system.
Select (Settings) on the function screen.
Select (Managing saved application data)> (Data saved in system storage)> (Copy to USB storage device).
Select a title.
Press the button to check the box of the saved data you want to copy and select (Copy).
In order to make a backup copy of the saved data, you must have updated the system software and logged in to PSN.
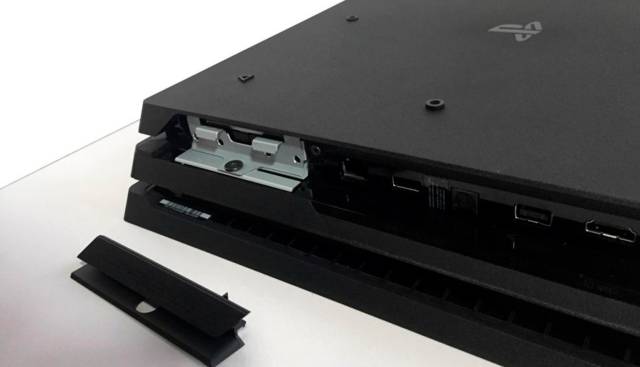
Place the system upside down on a flat surface and remove the hard drive bay cover. Remove it starting on the right.
You may see a sticker that covers the hard drive bay cover. You can remove it without problems since the warranty will not be affected.
Remove the screw (1) and pull the hard disk mounting bracket (2) to remove it.
Remove the four screws from the hard drive mounting bracket.
Remove the hard drive from the mounting bracket and insert the new one.
Replace the screws; Try not to overtighten them.
Reinsert the hard drive mounting bracket. Check out the image above to make sure you enter it the right way.
Replace the screw.
Replace the hard drive bay cover.
System Software Installation
Once you have replaced the hard drive, you must reinstall the system software. Using a computer, save the system software update file to a USB storage device for reinstallation (requires 1 GB of free space).
Copy the saved data from the games back to the PlayStation 4 system.
You can copy the data saved on a USB storage device to the PlayStation 4 system by following these steps.
Connect a USB storage device to the system.
Select (Settings) on the function screen.
Select (Managing saved application data)> (Data saved on the USB storage device)> (Copy to system storage).
Select a title.
Press to check the box of the saved data you want to copy and select (Copy).
You must be logged in with the same account you used when backing up.
If you backed up the data stored in the cloud using PlayStation Plus, you can now restore it safely.